Saturday, July 8, 2017

Brioche a Tete

Perfect Brioche a Tete

I have been obsessed lately with watching the Great British Baking Show. I absolutely love Mary Berry and Paul Hollywood! They have inspired me to get in the kitchen and try things that I always thought were too hard for me. I think croissants and brioche are scrumptious and now I can make them at home any time I want! I have to say that these rolls were so soft and fluffy and buttery tasting  that I just can't get enough of them. They taste so special I want to make them every time I have company!
This is Paul Hollywood's recipe and instructions that I saw on the master class on Netflix if anybody wants to go watch it for the perfect instructions on how to make these.
I did not use the proper tins for baking these buns just a Texas sized muffin tin that I already had in my kitchen.

500 gr. Bread flour or 4 cups
50 gr. Sugar, granulated or 1/4 cup
7 gr. Salt or 1 1/4 teaspoon
10 gr. Fast acting yeast or 31/2 teaspoons
140 ml. Whole milk room temperature
5 Eggs room temperature
250 gr. Butter, unsalted and softened or 2 sticks plus 2 teaspoons
1 egg for an egg wash

Put the flour in the mixing bowl with a dough hook then add the salt and yeast on opposite sides of the bowl and give it a slight mix not lettting the yeast and salt touch each other. Now add the milk, eggs and sugar. Mix with dough hook on low for about 5 minutes. When the dough makes a ball turn up to medium speed and mix for another minute or so.
Add the butter in a big chunk in the middle of the dough and mix on medium speed for 6 minutes.
Move dough into a clean bowl and cover with cling wrap and refrigerate over night.
Roll out dough on floured surface making a cylinder or roll. Cut it into six pieces and out of those pieces pinch off some dough to make the round tops. Using your hands as a cage roll the dough around with floured hands to make a ball. You will have six large balls and six small balls. Place the big ball in a tin and then put the small ball on top by making a slight indentation with your finger in the large ball with it being slightly sticky and then set the small ball on top.
Cover with a bag, I use a clean trash bag, and let rise at room temperature until at least doubled in size. About 45 minutes to an hour.
While they are rising, preheat your oven to 400. Make an egg wash and brush the tops before they go in the oven. Don't let the egg was run down the sides or the buns will stick and they won't come out of the tin properly. Bake at 400 degrees for 15-17 minutes or until golden brown. Serve warm!

Monday, December 19, 2016

Molasses Cookies

Its December and I am trying out a lot of different recipes to compare and see which ones are keepers. Funny thing is that it seems I always come back to my old recipes that have been handed down from my family members.
This recipe came from my mom and I think someone gave it to her when she was teaching school. I remember I brought these cookies to a swim meet during the holidays and one of the officials said that it was his favorite cookie and he hadn't had one that tasted like his grandmothers for a long time and that this one really hit the mark!
I have so many versions I am posting this one so I don't forget again which one is my favorite.

3/4 C unsalted butter
1 C brown sugar
1/4 C molasses
Beat this together for 2 min. at med. high speed until well incorporated.
1 lg egg
Add egg and beat well.
2 C flour
1 t baking soda
3/4 t ground ginger
1 t cinnamon
1/8 t ground cloves
1/2 t salt
Mix together the dry ingredients. Add to wet ingredients and beat until combined on stir. Or low.
Refrigerate a bit then roll into 1" balls or slightly larger but not 2". Place on cookie sheet and then flatten slightly with a sugared bottom of a glass. Then sprinkle with a bit of sugar and bake for 8 min. at 375 degrees. Let cook a couple of min. then place on a wooden surface to cool completely.

Thursday, December 8, 2016

Mini Pecan Pies

I remember my Mom making these during the Christmas holidays but I make them all year round now. I think the ratio of filling to pastry is just perfect and not too sweet like a regular Pecan pie can be sometimes.They are the perfect size for a party and super simple to make!

Pastry
1C flour
1/4t salt
1/2C butter
41/2 oz. cream cheese
Beat together with mixer and chill

Filling
1 lg slightly beaten
3/4C brown sugar
1t vanilla
1T melted butter
1t bourbon
1C chopped pecans
Mix egg and br. sugar then add the rest of the ingredients and mix well.

Roll the dough into inch balls and then pat the balls into a shell in the mini muffin tins. Using a teaspoon add the filling 3/4 the way up the shell.
Bake at 425 for 10 min. Or until the dough is a golden brown. Cool slightly then remove to a wire rack to cool.

Christmas Muffins

There muffins can be made big or small but men and boys alike seem to love the mini muffins best. I have fond memeories of my brother popping theses things in his mouth by the dozens. They are yummy muffins rolled in melted butter and then in a sugar and cinnamon mixture. Even though I make these during the holidays they are delicious any time of year. I literally have men beg me to make theses things for them.
The muffins make great give away treats during the holidays as well as a yummy party treat. Don't ever bother making a single recipe or you will regret it!

1/3C butter
1/2C sugar
1 lg egg
1 1/2C all purpose flour
1 1/2t baking powder
1/2t salt
1/4t nutmeg (freshly grated)
1/2C milk
1t vanilla

Topping
6T melted unsalted butter
1/2C sugar
2t cinnamon

Grease and flour either regular muffin tins or mini muffin tins. 18 large or about 36 mini.
Mix together the butter sugar and egg. Mix the dry ingredients and add alternately with milk. Add vanilla.
Fill muffin tins 2/3 full with batter.
Bake at 350 for 15 min. for mini muffins and 20-25 min. for regular sized muffins.
Melt butter. Mix cinnamon and sugar together. You can add more cinnamon it should look like the sand at south padre island.
Remove from pans immediately and roll in melted butter then roll in cinnamon sugar mixture. Cool on racks or serve warm.


Eggnog Pound Cake

Ok so this cake is the quintessential Christmas cake because if Christmas had a taste this would be it! The moment you bite into it I swear you hear Christmas carols. It's a pretty cake too with a swirl that you can see when you cut it.
I found this recipe a long time  ago and I think it was in some kind of southern living magazine or cookbook that I came across and no longer have. This is the cake I make every year that looks adorable on my cake stand and is a real crowd pleaser. In fact, Scarlet, my youngest, called for the recipe the other night to take her work Christmas party. Now it will be here and all my girls can access it!

1C unsalted butter
3C sugar
6 lg. eggs
3C flour
3/4t baking powder
1/2t salt
1C eggnog
2t vanilla
2T brandy
1t cinnamon
3/4t nutmeg
1/2t allspice
1/4t cloves

Grease and flour bunt pan.
Beat butter and sugar 5-7 min. add eggs one at a time beating after each. Mix together the flour, baking powder and salt. Do not add the spices now. Add the dry ingredients alternately with the eggnog beginning and ending with the dry ingredients.beat at low speed. Stir in the vanilla and brandy.
Pour half the batter in to the bundt pan and add the spices to the remaining batter and pour evenly on top of the batter in the pan. Take a butter knife and swirl in the top batter.
Bake at 350 for 50-55 min. or until a wooden toothpick comes out almost clean with a few crumbs attached but not wet.
Let the cake cool on wire rack for 10 min. Then invert on a plate.

1C powdered sugar
2T plus 1t cream

Mix together and drizzle over warm cake.


Saturday, January 30, 2016

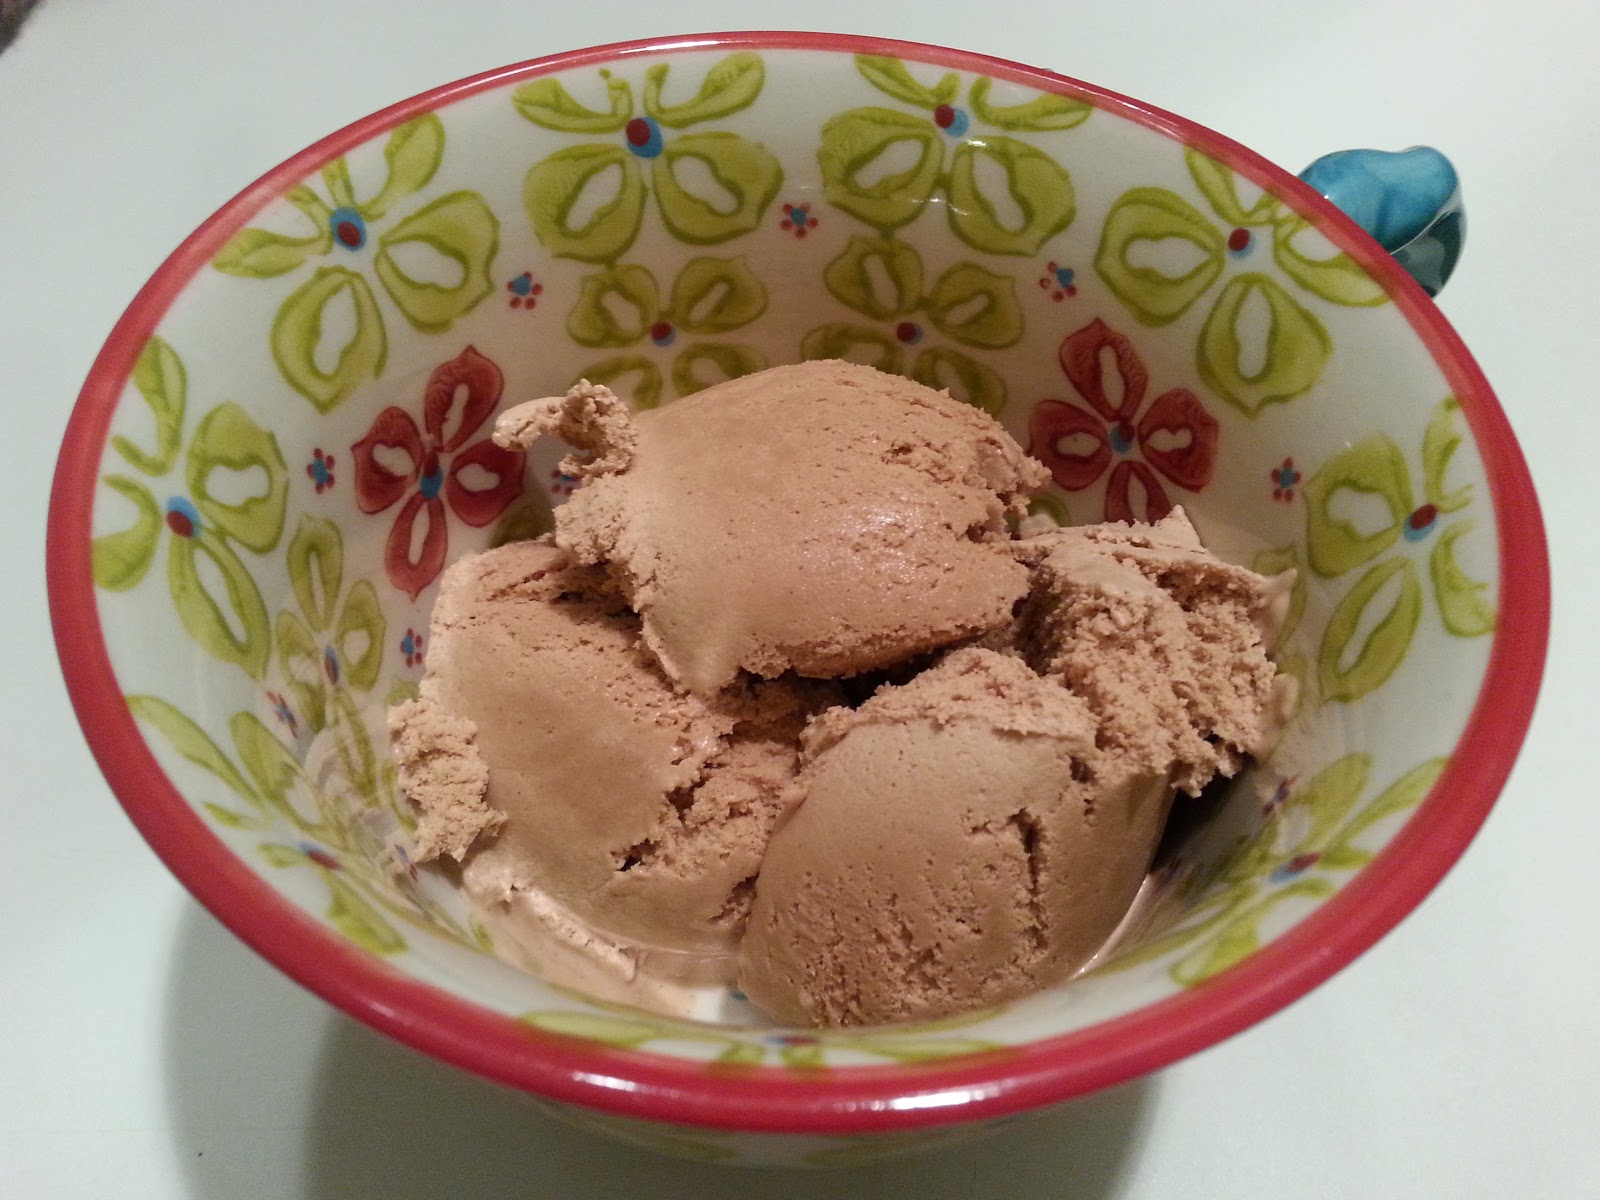
Chocolate ice Cream with honey and stevia

I have been on the search for the yummiest ice cream recipe made without any refined sugar and after many batches of not so yummy ice cream I have finally perfected a delicious recipe. All the other ice cream recipes I have tried ended up being too hard to even get a spoon to sink into it and impossible to get out of the container after being in the freezer over night.
This ice cream is soft and creamy even after being in the freezer for days!
I have the kitchen aid ice cream maker attachment and that is what I used to make this recipe.
I am pre diabetic and am always looking for dessert recipes that I can use stevia in and still have them turn out right. This recipe also has honey in it but not enough to shoot up my blood sugar. I am not on any medication and manage my blood sugar with diet only. I am so excited to have something chocolate to eat!

2 C heavy cream
1 1/2 C whole milk
7 large egg yolks
1/3 C Hershey's Cocoa powder
2 t vanilla
2 T Truvia
3 1/2 T real honey ( runny not creamed)
1 T amaretto or 1t cinnamon

Put the cream and milk in a pot and scald it over med low heat. That is when it skims over and there are tiny little bubbles around the edges. Do not boil!
Beat the egg yolks with the cocoa, vanilla, Truvia, and honey in a bowl.
Temper this mixture by adding the cream and milk to the egg mixture in a steady stream while whisking continuously so as not to scramble the eggs. Not the whole thing though, after about a cup you can then whisk the egg mixture back into the pot with the scalded cream and milk.
Put back on the stove at med low heat and cook stirring constantly with a wooden spoon until mixture thickens and coats the back of the spoon. You can test by running your finger across the back of the spoon and if it leaves a line it's ready. Take off the stove and add the amaretto if you are using it. Pour through a sieve or strainer into a container and cover with plastic wrap against the mixture.
Refrigerate overnight. Pour into an ice cream freezer and churn for about 30 minutes.
Transfer to an air tight container to freeze harder. You can also eat it soft serve style right out of the ice cream freezer.

Sunday, May 24, 2015

Biscuits

Right now I am obsessed with biscuit recipes. I have been reading the Lonesome Dove series and hearing Gus talk about making his famous sourdough biscuits got me drooling and thinking. Now I have been making biscuits all of my adult life and I do have some favorite recipes that I rely on but I have never had a sourdough biscuit and I have decided that this is something I have to try.

I needed a starter of course and this takes time when you are beginning from scratch. I don't want to buy one and I don't want to use commercial yeast either so there will be some trial and error happening for a while I'm afraid. Naturally, while this is going on and with biscuits on my mind I have decided to try some other recipes that have always intrigued me in the interim.

I mostly try to post recipes that are my own but these are not and I am putting them here because as I have said before this is an online recipe book for my daughters to access from all over the world. I too am traveling more than I thought I ever would and would like to have my recipes handy!

While waiting on my sourdough starter, I tried the Chuck Wagon Biscuits from Southern Living Hertitage Breads cookbook. They are spectacular! These biscuits are light and fluffy and will remarkably last for three days continuing to be moist and tender. Now I usually make biscuits for breakfast but this recipe needs a rise time so I will only make these as dinner biscuits. Pictures will come later because when I took these out of the oven my realtor had just come by to tell me I had an offer on my house which I am trying to sell in order to move to NYC to live with Micheal and Alexandra, my middle daughter and son in law. In all the excitement over the offer I forgot to take pictures!

My favorite morning biscuits are a cream biscuit and I have seen this recipe floating around in numerous places so I can't say where I originally found it. I am going to place it here and will add pics the next time I make them. I am also going to add the buttermilk biscuit recipe I tried this morning because they had such a good flavor and turned out just as they should with a nice crumb. I put together this recipe from perusing several different recipes from my cookbooks and the Internet. I have another post about my honey butter biscuits which are a drop biscuit and is a perfect accompaniment to fried chicken. I think the chuck wagon biscuit goes perfectly with chicken fried steak.

Chuck Wagon Biscuits
1 pkg. rapid rise yeast
1/2 cup tepid water
1 C buttermilk
1/4 C plus 1T vegetable oil
31/2 C flour
11/2T baking powder
1/4 t soda
1/8 C sugar
3/4 t salt
Combine yeast and water in a small mixing bowl stirring to dissolve. Let stand 5 min or until bubbly. Add buttermilk and oil to yeast mixture and stir well.
Combine dry ingredients in a large bowl add buttermilk mixture stirring with a fork until moistened. Turn dough out onto a floured surface and knead 3-4 times. Shape dough into 2 in balls place 1/8 in apart in a well greased cast iron skillet. Cover and let rise in a warm place(85degeees) for an hour and a half or until doubled in bulk.
Bake at 425 for 12 min or until golden brown.

Buttermilk Biscuits
2 C flour
2 t baking powder
1 t sugar
1/2 t salt
1/4 C plus 1T butter
1/2 t baking soda
1C buttermilk
Mix together flour, baking powder, and salt in a bowl. Cut in the butter with a pastry blender and mix until it resembles coarse meal. Disolve soda in the buttermilk beating with a fork. Pour into dry ingredients and mix with fork until moistened.
Turn out onto floured aurface and knead about 15 times. Roll out 3/4in thick and cut with 3in biscuit cutter and place on a greased baking sheet. You can reroll out the dough for more biscuits.             Bake at 450 for 12 min.
It makes about 6

Cream Biscuits
2 C flour
1 T baking powder
1 t salt
1C heavy whipping cream
Combine flour, baking powder, and salt. Beat whipping cream until soft peaks form(some recipes do not call for beating the cream but I think it makes them a bit lighter). Stir in flour mixture until blended. Turn dough out on lightly floured surface and knead 10-12 times. Roll out 3/4 in and cut with 3in biscuit cutter. Place on greased baking sheet.
Bake at 450 for 10-12 min. It makes for 6-8 biscuits.


Thursday, September 11, 2014

Tiny Tot Pecan Pies

My Mom liked all things pecan and we used to make these a lot when I was growing up. This sweet treat is one that all my girls agree on as one of their favorites. I started Scarlet,

my youngest, making these in elementary school and she could do them  all on her own by middle school, sometimes not the prettiest but they tasted great.

I like these mini pecan pies even better than pecan pie itself. Samantha (oldest) says it is because it has a better ratio of filling to crust and I agree wholeheartedly! Alexandra (middle child) and I like more crust than pie anyway so I think we should make every pie mini.

Crust
1 C all purpose flour
1/4 t salt
1/2 C butter unsalted
4 1/2 oz. cream cheese
Mix together in a mixer and then chill.

Filling
1 egg slightly beaten
3/4  C brown sugar
1 t vanilla
1 T melted butter unsalted
1 C pecans
1 t southern comfort opt.
Mix together in a bowl with a whisk or fork.

In mini muffin tins take the chilled batter and roll into a ball and then press into the sides and bottom on the tin evenly to look like a pie crust. Fill the cups almost full, they will puff up a bit while baking.
Bake at 425 degrees for 10 minutes or until the crust edges are beginning to brown slightly.
Remove from oven cool a bit and then take out of the pan and cool completely on a wire rack.

Friday, August 29, 2014

Brownies

Every year when my girls were young I would make brownies on the first Friday of the first week of school. I figured they deserved a treat and they usually had arranged to have friends over to spend the night. The whole group was always excited to come home to a sweet treat.

They are so easy to make and they don't destroy the kitchen in the process. They are perfect to make while everybody is at school so that they have time to cool completely before somebody grabs one.

My youngest is starting her senior year in college and she attending school close to home so I decided to treat her. This time after seeing so many brownie recipes claiming to be the best, I decided to bake three different ones and let she and her friends decide which recipe is the best. I am making the ones I always make which should take her back to her childhood, another recipe using semisweet chocolate instead of the unsweetened one I am already making and one that I first saw in one of my cooks illustrated magazines that I recently saw adapted on the internet. I had made the cooks illustrated one a few years ago and I didn't care for them. They were just too gooey and you couldn't carry them with yours hands-they needed a plate.

I think the cooks illustrated brownies turned out almost exactly the same as the last time I made them, way to gooey and really hard to cut and plate. I cooked them a bit longer than last time but they didn't firm up at all. They don't have any leavening in them so maybe that is what I don't like. They remind me of some brownies that I made for a Christmas party, it was a Nigela Lawson recipe and they just wouldn't set up so I kept putting them back in the oven with no luck. When I finally had to serve them we scooped out the brownie with a plastic spoon, put a dollop of whipped cream on top and called them reindeer poop. Everybody loved them anyway.

Scarlet definitely recognized her childhood brownies and they are still her favorite. The semisweet version was popular for those that like a lighter chocolate flavor. All you have to do is substitute the Bakers unsweetened chocolate with the Bakers semisweet chocolate.

Brownie Recipe
3 oz. Bakers unsweetened chocolate
2/3 C butter
3 lg. eggs
1 1/2 C sugar
2 t vanilla
1 C all purpose flour
1 t baking powder
1/2 t kosher salt
1 C nuts opt.
Melt the chocolate with the butter in a pot on a a very low heat and whisk constantly till smooth. In a bowl beat the eggs, sugar and vanilla together with a whisk. Add in the chocolate and whisk till smooth. In a measuring cup, measure the flour then add the baking powder and salt then mix. Add this to the chocolate mixture and stir with a spatula just enough to incorporate. Add the nuts if you are using them.
Pour batter into a greased 9x9 or a small rectangle brownie pan. Bake at 350 for 28-30 min. Cool in pan on wire rack completely then cut in squares.

Here is a picture of all three brownies: orange plate are the brownies that is the recipe above, red plate are the brownies that used the semisweet chocolate, and the blue plate are the cooks illustrated brownies.

Sunday, August 24, 2014

Banana Rum Coffee Cake with Browned Butter and Rum Drizzle

I had just made a pound cake that I had been dying to try, it was the pound cake from Chickens in the Road blogger with a pound of everything in it not just a pound of butter. It was delicious even though I opted not to put any kind of frosting or glaze on it but I don't think it needed it at all, it totally stood on its own.
My daughters told me they still preferred my pound cake which is posted on this blog as a citrus pound cake. It originally just had vanilla and nutmeg for flavoring which is delicious but I like the variation of citrus in the summer or the holidays.
Both Alexandra and Scarlet were leaving so I packed up what was left of the cake for them to take in the car. Scarlet and her boyfriend John were driving Alexandra up to Dallas to catch a flight to Spain to visit Samantha, my eldest.
My neighbor, Janis, had surgery and I had intended to take some of the cake over to her to aid in her recovery. Now with nothing to take over, I looked around the kitchen and saw an abundance of aging bananas so I started researching recipes looking for inspiration and this is what I came up with. The original recipe was a barefoot contessa banana cake that I spun off of. This coffee cake is scrumptious and just what I think Janis needed to help her feel better!

Cake
3 very ripe bananas
3/4 C sugar
1/2 C brown sugar, lightly packed
1/2 C canola oil
2 lg. eggs
3 T dark rum ( I used Zaya12yr. aged)
2 C all purpose flour
1 t baking soda
1/2 t kosher salt
1 t cinnamon
1/2 t  nutmeg, freshly grated

With a paddle attachment beat the bananas on low speed until mashed then add the next 3 ingredients and incorporate. Now add the eggs and beat until smooth. Next add in the rum. Mix the next 5 ingredients together then add to the wet ingredients in the mixing bowl. Beat until smooth. Pour into a greased and floured 9 in. round cake pan. Sprinkle crumble on top.

Crumble
3 T flour
5 T brown sugar
2 T butter
Cinnamon
In a bowl use a fork to make the crumble pressing the ingredients together into the size of large peas.

Bake in the oven at 350degrees for 45 min. Or until a toothpick comes out almost clean.
Cool for 15 min. Then using a plate turn out the cake and then put a plate on the bottom and turn over right side up to cool.

Drizzle
1/2 stick butter
About a cup or cup and a half of powdered sugar
1t vanilla
1 T dark rum
Put the butter in a small pot over med. heat and boil until brown stirring with a spoon occasionally. Take off the heat and add the powdered sugar whisking smooth. Pour into a bowl and add the vanilla and rum. Whisk smooth. Add more powdered sugar until it is a drizzle consistency. Drizzle over the warm cake.

The cake is super moist and fluffy in case you can't tell from the photographs. Really good on the second day too!

Wednesday, July 23, 2014

Cherry Coffee Cake

I had some left over cherries that were fading fast so decided to make a coffee cake with them. It's the perfect size to accommodate my leftover cherries.

1 1/2-2 C cherries pitted and halved ( I used both Bing and Rainier)

Take the cherries and cook them in a sauce pan on the stove with a splash of water, enough sugar to make them sweet( I used very little sugar since my cherries were already sweet, maybe 1/4 C), and a couple of tablespoons of southern comfort. Cook them until they are thick and soft but not mush. Refrigerate.

1 C flour
1/2 t baking powder
1/4 t baking soda
1/8 t salt
1/2 C Greek yogurt ( I used Fage)
3 T melted butter
1 t vanilla
Sliced almonds for sprinkling on top

Take the dry ingredients and mix together in a bowl. Mix the wet ingredients in another bowl then add the wet to the dry and mix until just incorporated.
Spread half the batter into an 8 inch buttered and floured round cake pan. This will be hard to do just keep gently spreading with an off set knife until even. Take the cherries and spoon them out of the container leaving the excess syrup behind (but don't drain, you want a little bit) onto the batter in the pan evenly distributing. You want to use about 1 C of cherries. Spread the rest of the batter on top of the cherries. Take your time spreading gently, it's okay if some of the cherries peek out a bit. Sprinkle the top with sliced almonds. Bake at 350 degrees for about 25-30 minutes. It will be golden brown on top. Remove from oven and run a knife around the edges.

I am lucky I have my grandmother's cake pans that have a scraper built in that runs around the bottom and sides of the pan. Everything comes out so easily!

Icing
1/4 C powdered sugar
1-2 T cream
1/4-1/2 t vanilla
Mix together and drizzle over top of coffee cake.


Tuesday, July 22, 2014

Cauliflower Risotto

I love risotto and I love mashed potatoes AND I love Alfredo sauce. This recipe satisfies those loves all wrapped up in one AND I get my vegetable!

1 large cauliflower head
1 C chicken stock
1C white wine
1 t salt
4 oz. cream cheese
2 T butter
1 C heaping, parmigiano reggiano
1 T fresh thyme, chopped fine
1/2 C cream
1 clove of garlic (optional) chopped

Cut up the cauliflower in to large florets and discard the stem. In a pot put the stock, wine, and cauliflower florets then sprinkle with 1 t salt. Bring to a boil with the lid on then move the lid slightly off so that some of the steam can escape. Cook until the cauliflower is soft making sure that you still have liquid in the bottom of the pot so as not to scorch the cauliflower. Add more stock and wine as needed. You want a little liquid in the bottom when you are through.

Do not drain. Add the butter, cream cheese, thyme and parm. cheese. If you are using garlic add it in now. Let stand a few minutes with the lid on. Add in the cream. Use a submersible blender and blend until smooth. Taste then add salt and pepper as you like.

Wednesday, July 16, 2014

Chocolate Cream Pie

This is my favorite summertime dessert because it is cold and refreshing with a milk chocolatey taste. I make this pie at least once every summer and I love to make it for company. Invariably, someone will remark that it tastes exactly like what they used to have as a child when they were at the country club where they were spending their long days of summer.

One summer we decided that we needed to have a taste test and see if the pie was better with dutch processed cocoa or Hershey's cocoa. My friends that were born and raised in Ireland were over and were boasting that they would prefer the dutch processed one and would certainly be able to tell the difference. Everyone preferred the one made with the Hershey's cocoa and no one could tell which one was which, only that they tasted a bit different. I love having taste tests!

The pie crust I am using is my favorite for all my pies, not just cream pies but fruit pies too! I was on the hunt for a pie crust that doesn't use shortening and I ended up down the street at my friend Pam's house. I explained what I was searching for and her mother (Betty) suggested I use her recipe, I did and have loved it ever since. It makes enough for a bottom of a deep dish pie or a top and bottom for a regular pie.

Pie Crust

2 C flour
1/2 t salt
2/3 C unsalted butter
2 t sugar
1 egg yolk
3-4 T cold water
Cut the cold butter into cubes. Mix together the flour and salt. Add the butter and rub it in with your fingers until it looks like crumbs and feels like wet sand. Make a well in the center and add the sugar and egg yolk and start with 1 T water mixing with your hands to form a ball. Add more water as needed but use as little as possible to form the ball. Press into a disk and wrap with plastic wrap. Refrigerate for at least 30 minutes.

Roll out the dough on a floured surface forming a circle to fit your pie pan about 1/8 inch thick. Place in pie pan with a little over hang to flute the edges. Place in the refrigerator and chill again so that the dough can relax and not shrink so much when baking.

Prick the pie shell with a fork. Place parchment paper in the pie shell and then place another pan on top to keep the pie shell from shrinking. Bake at 425 degrees for about 10 minutes then take out the extra pan and continue baking for 5 more minutes until golden brown.

Let the crust cool.

Pie Filling- I found this recipe 30 yrs. ago in a southern living magazine.
1 C sugar
1/4 C cocoa
1/4 C corn starch
Pinch of salt
3 C milk
3 egg yolks
1 1/4 t vanilla
1 C whipping cream for whipped topping
1/4 C powdered sugar
1 t vanilla

Combine first 4 ingredients in a heavy sauce pan. Combine milk and egg yolks, beating together, then gradually whisk into dry ingredients. Cook over medium heat, stirring constantly until it thickens and boils. Boil for 1 minute while stirring constantly. Remove from heat and add vanilla ( you can also add chocolate liqueur, a couple of tablespoons). Immediately pour into pie shell. Cover with waxed paper to prevent a skin from forming. Cool 30 minutes then place int the refrigerator to chill completely.
Beat whipping cream with powdered sugar and 1 t vanilla until soft peaks form. Spoon whipped cream over pie.


Wednesday, July 9, 2014

My Grandmother's Carrot Cake

This recipe was my grandmother's recipe and she was known for her cake baking. My mom never felt like she could compete so she honed her abilities with pie baking. Now I have the best of both worlds with recipes and tips from both of them.
Tonight I had a request for a carrot cake and I warned them, if you are used to those fluffy, heavily frosted rectangle carrot cakes, this one is not for you. They assured me whatever kind I made is the kind they wanted so I said,"okay here we go."
This bundt cake is moist, intensely flavored with spices and will stay delicious for days. In fact, it was so moist and good that my grandmother never put any kind of icing on it and when I used to make it for my kids I didn't ever bother icing it either. They loved it just plain. But tonight I will be adding a cream cheese glaze because that is what most people expect. Not too surprisingly, Scarlet, my youngest daughter, upon eating the first piece of cake exclaimed,"I like it better without the glaze!" Everyone else liked the glaze.

1 1/2 C canola oil
2 1/2 C sugar
4 lg. eggs separated
5 T hot water
2 1/2 C all purpose flour
1 1/2 t baking powder
1/2 t baking soda
1/2 t salt
1 t nutmeg, freshly grated
1 t cinnamon
1 t ground cloves
1 3/4 C grated carrots
1 C chopped walnuts or pecans
Mix oil and sugar on med. speed with the paddle attachment of a mixer. Add egg yolks one at a time then add the hot water and continue mixing until incorporated. Mix together the dry ingredients and add to the egg mixture on med. speed. Stir in the carrots. Beat the egg whites with a whisk attachment on high into soft peaks then fold into the batter.
Grease and flour a large bundt pan then pour the batter in and bake at 350 degrees for an hour or and hour and 5 min. Check with a wooden tooth pick, it is done when there are just a few crumbles sticking to the toothpick. Let cool for about 10 min. then invert onto cake platter. Pour glaze over the cake while warm.

Glaze
4oz. Cream cheese, softened
1C powdered sugar
1t vanilla
Several tablespoons of milk. Mix together on high in order above adding only enough milk to make it a thick but pourable consistency.

Saturday, July 5, 2014

Summer Cheesecake

The first time I ever had real cheesecake was many years ago, the first time I ever visited NYC and I thought it was amazing. Up until that time, I had only eaten the kind you made in a pie pan that my mother's friends were making and I wasn't particularly impressed. The next time I had good cheesecake was one that my sister in law made which was a praline cheesecake which reminded me of the one I had in NYC only better! (I plan to add her recipe to my blog later). She shared the recipe and I bought my first spring form pan so I was in business. The recipe my sister in law had given me was heavy and decadent which I love for winter but I wanted something lighter tasting for warmer days. I found a recipe for a plain cheesecake and changed things around a bit resulting in a cheesecake that tastes light and summery!

Crust
1 C graham cracker crumbs
21/2 T melted unsalted butter
2 t sugar
Mix above ingredients and press into a greased springform pan about half way up. Bake at 350 degrees for 8 min. Take out and set aside.

5 8oz. cream cheese packages
11/2 C sugar
Cream together on med speed of electric mixer.
Zest of 1 orange
Zest of 1 lemon
2 t vanilla
3 T flour
5 eggs and 2 egg yolks
Mix in eggs one at a time with the other ingredients on med speed.
1/2 C sour cream
2-3 t southern comfort (this makes a huge difference in the taste)
Mix again. When you remove the whisk from the mixer use your fingers to get the batter off because little pieces of zest will be clinging and you want to stir them back into the batter. Wrap the springform pan with foil. Make sure that no water can seep in. Put your foil covered spring form pan in a larger pan that you can pour water in about half way up the sides. Pour the batter over the crust, filling the pan.  Put the pans into the 350 degree oven and then pour water into the outer pan making sure water will not get inside the foil. In other words you are baking it in a water bath. Bake for 1 hour to an hour and 5 min. It should still be a little jiggly in the middle. Take out, remove from water bath and let cool completely. Run a knife around the edge when you take it out of the oven. After it has cooled take off the rim of the pan. Refrigerate until cold.
This is the picture of one baked in a water bath.
The one below was not baked in a water bath, it has browned on the edges and has risen over the edge of the pan but will fall back in as it cools and it will crack in the middle.


Friday, July 4, 2014

Peter Rabbit Cole Slaw

I love to make this cole slaw in the summer because it is so cool, creamy and a great side dish for fried food. I like to serve it with either fried chicken like I have pictured or with fried shrimp. I gave it this name because every time I make it I think you could find all these things in Mr. McGregor's garden and thats what Peter Rabbit was after.
The cabbage at the store was enormous so I just used half a head but if you find small ones you can use the whole head.
1/2 head green cabbage, sliced
1/2 head purple cabbage, sliced
1 small bunch cilantro chopped, about 1C
1 bunch green onion, about 6
4 carrots slice thinly, I used a mandolin
Enough mayonnaise to coat the slaw, about 11/2-2 C
1 t garlic powder
1/2 t celery salt
Salt and pepper
Mix all the ingredients in a big bowl and chill.


Thursday, July 3, 2014

Sand Tarts

My mother moved to the Rio Grande Valley and specifically Rio Grande City shortly after World War II where my Dad had been offered a job. My parents, a newly married young couple, made new friends and began their life together. They spent quite a bit of time bonding with their friends by partying in Mexico enjoying the food and dancing into the wee hours of the night. Of course nothing ever stays the same and everyone moved on with my family ending up in McAllen but still located the valley. One of my mother's very best friends named Chichi moved back to McAllen from the Dominican Republic after living all over the world. I loved sitting at the kitchen table listening to all their stories. One particular afternoon Chichi served the most amazing sand tarts I had ever tasted, in fact, I had never really cared for them until I tasted these! I told her I absolutely had to have her recipe and she just laughed and said of course!
Years later, planning Alexandra's beach wedding (my middle daughter) we were tossing around ideas for the wedding cake. We all decided it was a bad idea to have a cake on the beach with the sand and wind blowing. Samantha came up with the idea of having sand tarts in a decorated see through cookie canister as part of the table decorations in loo of a wedding cake. These cookies taste very similar to the Mexican wedding cookie so we thought how perfect and they would be protected from any possible blowing sand. We considered buying them but we couldn't find any that tasted as good as the ones I make so Samantha sweetly offered to make them a couple of days ahead and take them to the beach for us.
She totally made a bijillion of them! They were so delicious our guests kept asking where we had gotten them and when we told them we made them they all wanted the recipe!


1 C  unsalted butter, softened
1/3  C granulated sugar
2 t vanilla (I use Mexican vanilla, La Vencedora)
2 C all purpose flour
1 C pecans finely chopped
Cream butter and sugar then add the rest of the ingredients until incorporated. Form dough into a disk then wrap in plastic wrap and refrigerate until chilled. Take the dough out and shape into whatever shape you like and place on an ungreased cookie sheet. Bake at 325 degrees for 20 minutes. Cool a bit then roll the cookies in powdered sugar and place on a wire rack to cool completely.
These cookies stay good for a long time in an airtight container.

Wednesday, July 2, 2014

Honey Butter Biscuits

When my girls were little they loved to get the biscuits from Churches Fried Chicken and so I set out on a hunt to find a recipe that would please them as much as those did. I wanted to make them at home anytime I wanted and I wanted to be sure of what went in them. I honestly don't know where I found this recipe and if I might have changed it over the years but these are great biscuits for breakfast or to along with a fried chicken dinner or even some BBQ.

2 C all purpose flour (I used Gold Medal)
2 t baking powder
1/2 t baking soda
1 t sugar
3/4 t salt
1 C cold buttermilk
8 T or 1 stick unsalted butter, melted
1/2 stick unsalted butter, softened
3 T honey
Pour the melted butter into the cold buttermilk and swirl around with a fork letting clumps form. Next, whisk the dry ingredients together in a bowl. Pour the buttermilk mixture into the bowl with the flour mixture. Stir with a rubber spatula until dough pulls away from the sides and there isn't any dry flour left. Do this gently. Use a 1/4 C measure and scoop up a level amount and drop onto a baking sheet. If the dough sticks to the scoop you can grease it with butter. Bake at 475 degrees for 12-15 min. While the biscuits are cooking, soften the butter then add 3 T honey and whisk until smooth. Taste to see if you like the honey to butter ratio and you can add more honey if you like.
Take the biscuits out and brush the tops with the honey butter and let run down the sides.
You may want to make more honey butter to drizzle on the inside when serving.
As you can see my daughter snagged one of the biscuits before I could even take the picture!


Friday, June 27, 2014

Individual Galettes

I was out of peaches and asked my ex-husband to pick some up for me at costco when he went the next time ( he goes almost everyday). He called me and said they were out but that he almost picked me up some nectarines instead. I was like I'm glad you didn't because I don't like them as much and he laughed and said they are the same thing and I indignantly said no they weren't they taste totally different. Now let me interject here and tell you that he has a minor in horticulture but I still wasn't a believer so I did some research on the internet finding out of course that he was right. I then decided to see if I was the only idiot that thought they were vastly different, apparently, I was.

The article I read explained that nectarines are just a recessive peach and can show up randomly on a peach tree and they have different names for retail purposes. It also said that Europeans preferred white flesh peaches (lower acid, milder flavor and sweeter) while Americans preferred the more robust less sweet yellow peach.

I love doing taste tests and well this is just screaming for one. I wanted the ripest best quality of all fruits involved so I bought peaches both white and yellow and nectarines both white and yellow and let them ripen up to eating perfection. I didn't want my results skewed by a particular fruit not tasting good because of under ripeness or over ripeness. I conducted my taste test and have found that I am in fact pure American and prefer the yellow fruit by far and I also like peaches better regardless.
Now I have a over abundance of fruit and need to do something with the white peaches and nectarines because I don't want to just eat them, that is what the yellow ones are for!

 Any stone fruit would work and a mixture would be good I think but next time it's going to be yellow peaches that is if I can keep from just eating them. This is what I did with the white peaches and nectarines.

5 white peaches and nectarines sliced and then each slice cut in half, my fruit was the size of softballs
3 T sugar
1 T southern comfort
1 t vanilla
Marinate the fruit for a few hours or overnight

Pastry recipe
2 C all purpose flour
14T unsalted butter cold cut into cubes
1/3 C sugar
1/3 C cold water out of the refrigerator
1/2 t salt
1/2 T apple cider vinegar
Mix the sugar and vinegar with the water and put back in the refrigerator. In a food processor put in the flour and salt and mix then add the butter and pulse until there are only small chunks of butter mixed in...just a few times...you want chunks of butter to make the dough flakier. Pour the flour mixture into a bowl and make a well in the center. Take out the sugar water and give it another stir. Pour into the well and mix with a fork until dough comes together and then turn out onto a floured surface and knead forming a disk. Cover in plastic wrap and chill for an hour or overnight.
Take dough out and roll out between parchment paper to about 1/8 inch thick. Chill another hour or two. Cut out about 4 inch disks and then roll them out a bit more giving them uneven edges. Place them on a baking sheet.

Drain the fruit.

Place a couple of tablespoon of fruit in the center of the dough disk. Fold over the sides working around leaving the center open securing with an egg wash of 1 T water beaten with an egg. Dip your fingers in the egg wash as you work the sides so they won't fall apart while cooking. Brush the tops with the egg wash and dust with cinnamon and sugar. I sprinkled sugar crystals on top to make them sparkle! Chill them for at least 30 min.

This pic is before baking.
Bake them in a 400 degree oven for about 30 min. They should be golden brown and bubbly.
 

Thursday, June 26, 2014

My Favorite Frittata


I have playing around with different combinations to come up with the most amazing one to serve my college buddies for breakfast when they come to visit this summer (we get together and catch up every summer). This is the outstanding winner!
I went to lunch with a friend I have known since high school and I was telling him about this frittata and how I thought he should make it so this recipe is for you Ben.

1/2 lb. roasted grape or cherry tomatoes
1/3-1/2 lb. breakfast sausage (not in a casing)
1 handful fresh spinach
1 clove garlic minced
3 lg. eggs
1/2 C cream (almost)
Salt and pepper
1/2 C parmigiano reggiano finely grated

To roast the tomatoes put them in a small pan and drizzle olive oil over them then salt and pepper, next sprinkle on some balsamic vinegar and put in a 400 degree oven and roast until wilted about 20-30 min. Let cool a bit before you put them in the frittata but you can make them days ahead and refrigerate till you need them.

I used a 8 inch skillet for this recipe which is enough for 2 but if you want to use an 11 inch skillet you will want to triple this recipe but I would only use 1 C of cream with the eggs.

Cook the sausage in the skillet on med. high heat. When cooked through add the spinach on top to wilt and add the garlic then stir around. Next add the roasted tomatoes. While all this is cooking, you can put the eggs in a bowl with the cream, salt and pepper and beat them with a fork or whisk until incorporated completely. Next add in freshly grated cheese and beat again. Pour mixture into the skillet and gently move everything around so that the egg mixture gets under all the ingredients in the skillet and everything is evenly distributed. Grate some cheese on top. Leave alone and let the eggs set a little then take the pan and put it under the broiler with the oven door shut. When the dish has bubbled up and has browned on top take it out and let sit a few minutes to set. You can cut out of the pan or you can try to remove it whole from the skillet on to a plate.
Frittatas taste fantastic at room temperature so just let it sit out and by the end of the day you won't have any leftovers!